Fenix BC25R Expert Review by Koen van der Jagt
In addition to a massive range of flashlights, head torches and camping lights Fenix also produces many different bicycle lights. Recently two newcomers were added to the bicycle light collection, amongst which the first ever red rear light, the RC05. The new headlight, which has been added to the BC25R, is, as of now, the entry-level model in this collection.
How good is this 'budget bicycle light' and what are the possibilities and special features? I will tell you all about it in this test. I will begin with a short introduction after which I will take a closer look at the light itself. After looking at all the options we get on our bicycles to find out how much light this compact bicycle light produces, and we also look at an equivalent. As with most Fenix lights the BC25R has been enhanced with a unique feature, one I will definitely highlight. Of course with the necessary amount of pictures, because well, a picture is worth a thousand words. Let's get started!
Unboxing
The BC25R is wrapped in a shiny 'hardcase' in the famous colours Fenix has been using for a while now. Most information and special features can immediately be found on the outside, you will definitely not need the manual for that. The good thing about this box is that it won't tear easily like, for instance, a cardboard box, to make sure you even store the light in it if you don't use it for a longer period of time. The light and its holder are neatly clicked in the plastic holder, but the accessories and included documents sort of 'roam' around in the box. Because the light is made from one piece, spare parts are not included: only the necessary charging cable and some mounting rubbers are included. In addition to a multi-lingual manual and a warranty card. Not excessive, but exactly what we need.
Specifications
On the box itself and inside the manual you will find the technical information of the BC25R. The brightness levels and the run times are also indicated here. I will not mention those here because Knivesandtools also lists these on their website. You will find the specs here. More about the possibilities and options later!
First impressions / Details
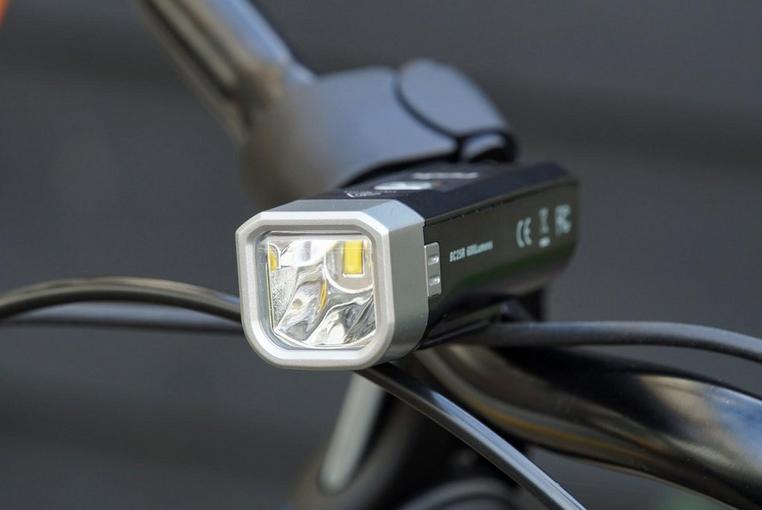
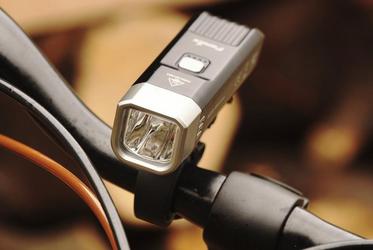
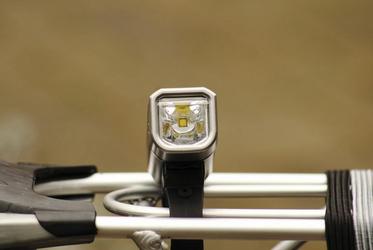
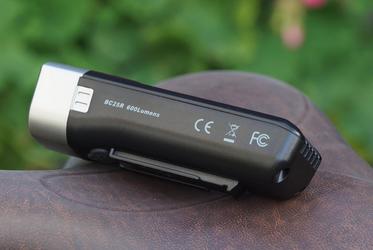
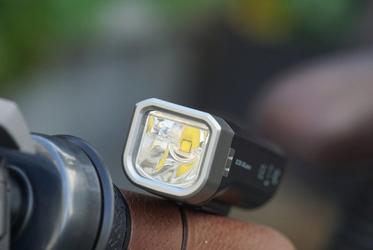
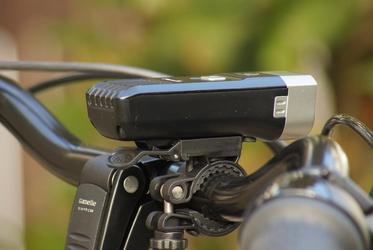
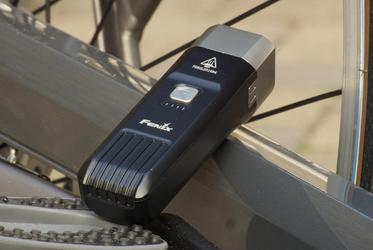
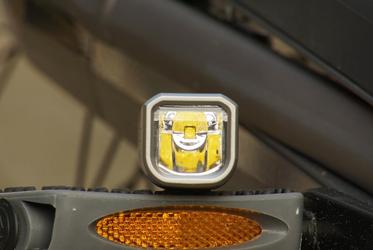
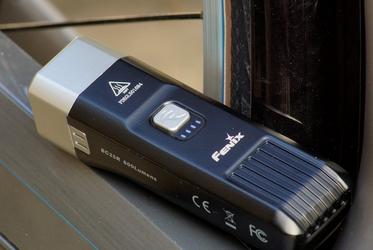
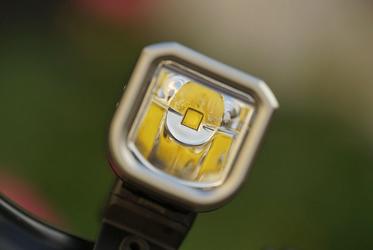
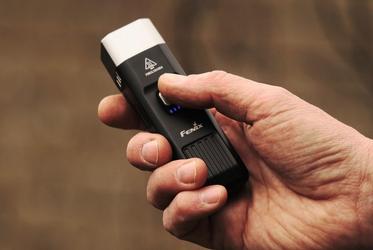
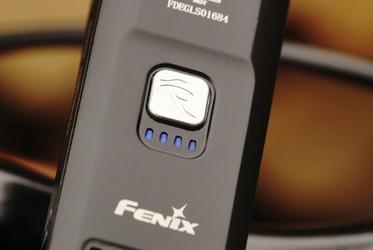
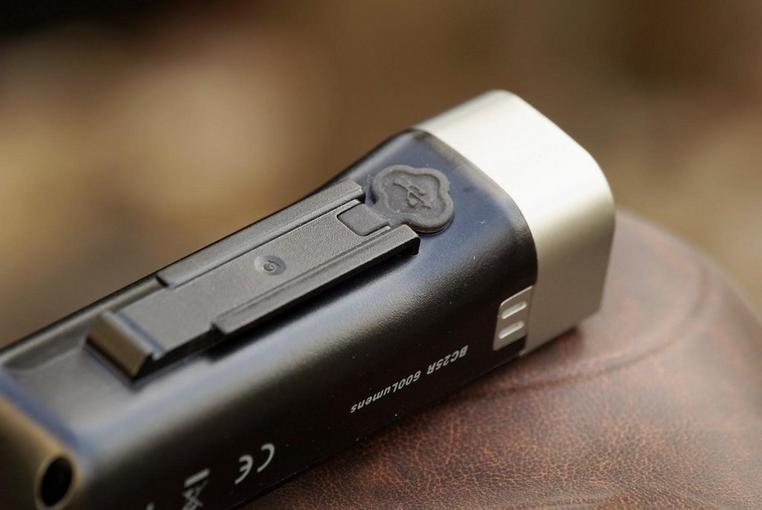
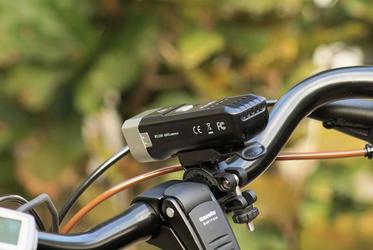
The BC25R is an elongated, rather slim light that doesn't feel too heavy. It looks a bit like its big brother, the BC35R; however, if I am frank I have to say that I feel the design of its other slightly more 'curved' brother, the BC21R is better. The light is made from both metal and plastic, even though you won't immediately notice this. The construction of the BC25R is simply too good for that. The light is properly constructed, we can't find any seams, sharp edges or flaws in the finish. The advantage of lights made from one piece is that the individual parts won't suffer from the continuously opening and closing of the device. In addition, the waterproof function can better be guaranteed. The disadvantage is that you cannot replace the battery. We see the famous Fenix colours: black and matt grey. A little austere, but there is nothing wrong with it. Small prints are added to the plastic parts of the light and the metal surface has been enhanced with engravings. Striking are the cooling ridges at the back; these are there to dissipate the heat properly. Especially in the highest mode of 600 lumens the light needs proper heat dissipation; an additional advantage of a bicycle light is that the wind actively helps cooling down the light. The plastic power-button is located in the middle and has a clear pressure point. Underneath the button we see four blue lights which give you the battery status. The base of the light has been enhanced with a type of 'rail', a raised edge which is used to quickly and effectively slide the light onto the holder. At the front of this rail you will find a micro-usb port that enables you to charge the BC25R. The light cannot stand up tall and can therefore not be used as a 'candle'. Also not really essential for a bicycle light. The head on the BC25R is the most striking aspect of the design. We see a square lens with rounded corners at the bottom with inside a special reflector with many 'mirrors' and different structures. This was clearly well thought-out and the idea was thoroughly tested. The purpose of the reflector is to direct the beam in such a way that you can light up an, as large as possible, surface, but also to make sure you don't blind oncoming traffic. Later on in this test we will see how this works in reality! The XP-G3 LED (the neutral white version) is neatly placed in the middle of the reflector. As it should be; a light source that is not properly centred can seriously affect the profile of the light. The included mounting clamp also looks solid; it is a new design I will discuss further when I discuss the controls of the light. In terms of construction quality and finish this light has nothing to worry about: Even after (unfortunately) quite the fall, which definitely damaged the BC25R, the light still functioned as it should, leaving me with only minor exterior damage. To support and/or clarify the story a couple of photographs that give you the details and highlights of the BC25R!
Controls/options
Generally speaking Fenix product are easy to understand in terms of controls, in other words: you can go a long way even without using the manual. The same applies to the BC25R. To start the light needs to be charged and how you charge it is rather obvious. Underneath the head you will find the USB-port, the cable is included and as a charger you can use a cell phone charger or your power bank. The number of amps doesn't really matter, most chargers are 1A to 2A and that is fine. While charging the blue indication lights will tell you more about how far you are. If all LED lights burn continuously the light is fully charged. Charging takes up to 2.5 hours, but only if the battery is completely drained. During use the indicators light up to make sure you know how much power is still in the battery. If your battery is starting to run out the indicator will blink as a warning. Compared to cheap lights the BC25R will function with the same intensity until the battery is completely drained. But it will also shut down at once... A little tip: Take a power bank with you, just in case! The light can namely also be turned on as you charge it via the power bank. It should, however, be noted that this is only an option in the lowest mode; but you are at least saved and can safely continue cycling in the dark.
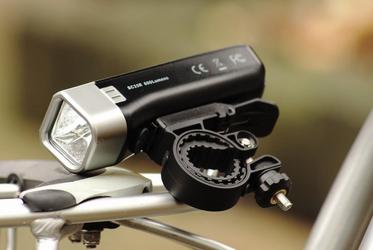
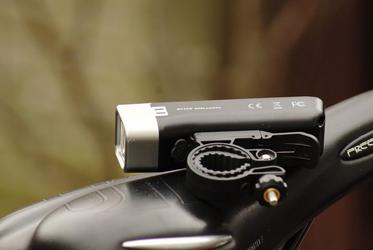
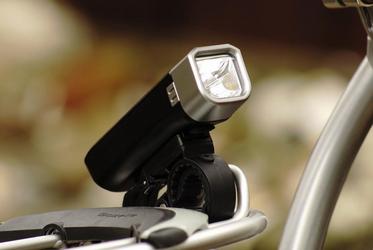
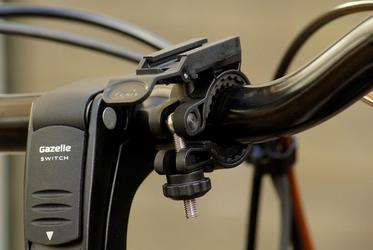
Mounting the light to your handlebars is easy. Unlock the holder, put the clamp around your handlebars, lock the holder and tighten the bolt until the holder is properly secured. Works fast and is incredibly easy. Fenix supplies rubber pads in different thicknesses because the thickness of handlebars can vary considerably. You can attach these rubbers on the inside of the clamp, they, however, do not always stay in place. So make sure you don't lose them! Because the handlebars on most bikes are relatively slippery I sometimes use an additional piece of tape underneath the holder to make sure it won't move as the result of shocks. Then you slide the light on the rail, you do so from front to back until you hear a click and the light is properly secured. To loosen it again you need to press down the lock/handle and slide the light forward. (Dis)mounting the light and the clamp will only take you seconds. You can determine the position of the light by, for instance, aiming it a wall located meters away. As such you can easily see if the beam is not aimed too high. If you want to use the light as a flashlight (which is a very practical option!) you can easily leave the clamp behind on your handlebars.
You can turn the light on or off by holding the switch down about a second. Subsequently you can, by pushing the button again, switch between modes, in the following order LOW > MEDIUM > HIGH > TURBO. The light will remember the mode last used. When you turn on the light the indicators underneath the button will light up simultaneously to make sure you can immediately and continuously see what the battery status is. The lowest mode begins with 50 lumens, which, personally, I feel is slightly high. Especially in urban traffic this can be experienced as distracting, and a lower mode will also use less energy. You mainly use the higher modes outside of urban areas, the turbo mode can also come in handy when you take an ATB off-the-road or when you are moving at high speed. The light has also been enhanced with a flashing mode. You activate the flashing mode with the help of a double click. You could, for instance, use this mode as a marker in case of a breakdown or as a signal function when you use the BC25R as a flashlight. All in all, the controls work accurately, the power button has a clear pressure point and is also easy to find while cycling. This is mostly due to the blue lights that always burn when the light is on.
Comparison to other lights
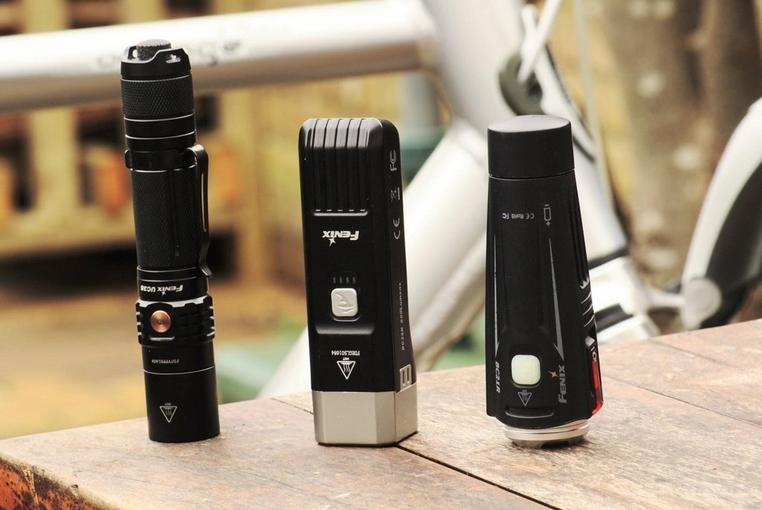
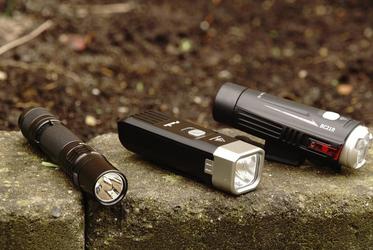
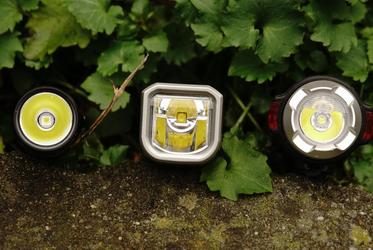
To give you a clear idea of the size of the light you will find a comparison of two lights made by the same manufacturer below: The Fenix BC21R bicycle light and the tactical flashlight UC35 V2.0. In terms of weight the BC25R is clearly the one that weighs the least. Later on in this review we will come across both lights again when we test the output.
Image/colour of the light
The shape of the head is clearly visible in the image of the light. Compared to most (bicycle)lights, you can see a marked horizontal line at the top of the profile and above you see virtually nothing. Beautifully done by Fenix. The hotspot is cone-shaped and provides enough light at about 15 to 20 meters. In addition, the beam is wide and lights up a broad area right in front of your bicycle to make sure you are not caught by surprise. When you are cycling in the middle of a road or street, the beam will cover the entire width of your path. When you test the light inside and point it at a wall it looks a bit strange: the profile has multiple stripes and clearly defined transition areas. Outside this seems to have disappeared enabling us to see how this light will light up your path! Below you will find the examples based on photographs.
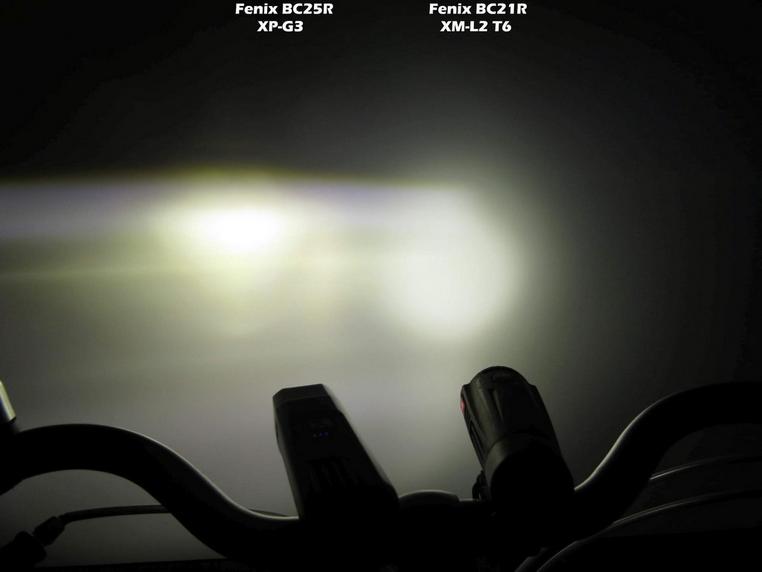
The colour of the light is relatively yellow. You can clearly see this when we compare the BC25R to the BC21R. The colour is a lot less even than the BC21R, you can clearly see a mixture of yellow and white in the light profile. The advantage of this warm colour is that it is not as blinding: for yourself when it is foggy out, and for oncoming traffic. I liked it, especially in between all the cold white, blinding lights you find on the average (electric) bicycle today.
Beam shots
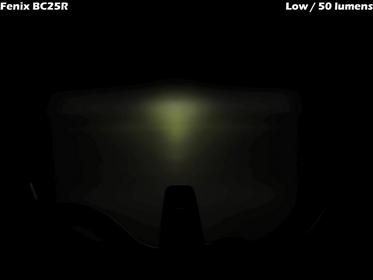
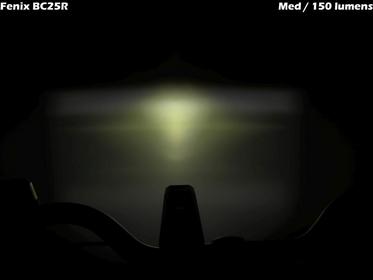
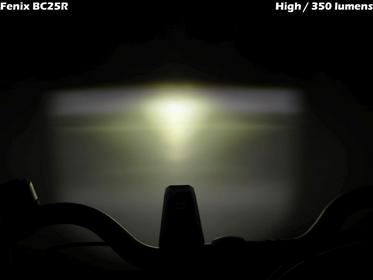
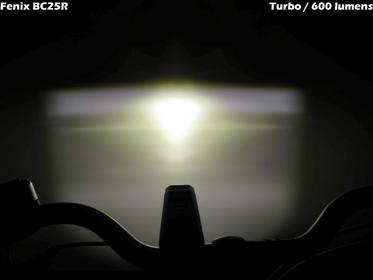
Time for real-life examples! We start with the bicycle inside with the light aimed at a white wall. The distance to the wall is approximately 1 meter. Below you can see the four light modes on the BC25R: The colour of the light appears to be yellow in the lowest mode, but is enhanced with more white in the higher modes. The typical 'shield shaped' profile is also clearly visible.
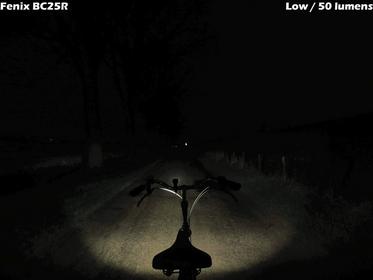
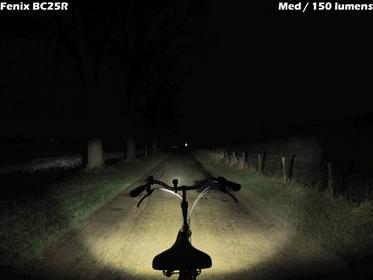
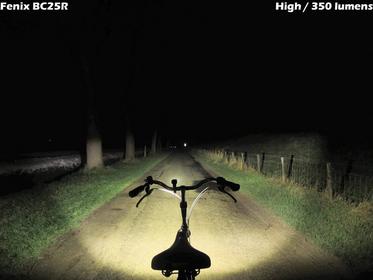
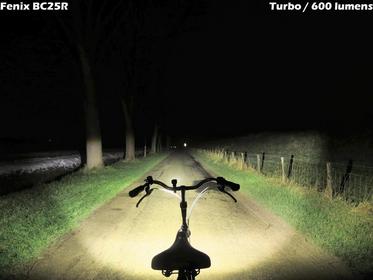
The most important thing to know is what this looks like outside. The first location we will visit is a road at the bottom of a dike with a couple of large trees on the left side of the road. As such we can immediately see how the BC25R works in terms of reach and colour. Below the four light modes with the light mounted to handlebars. You can see that the intensity around the wheel and in the narrow path forward is highest; in the meantime the roadside is also sufficiently illuminated.
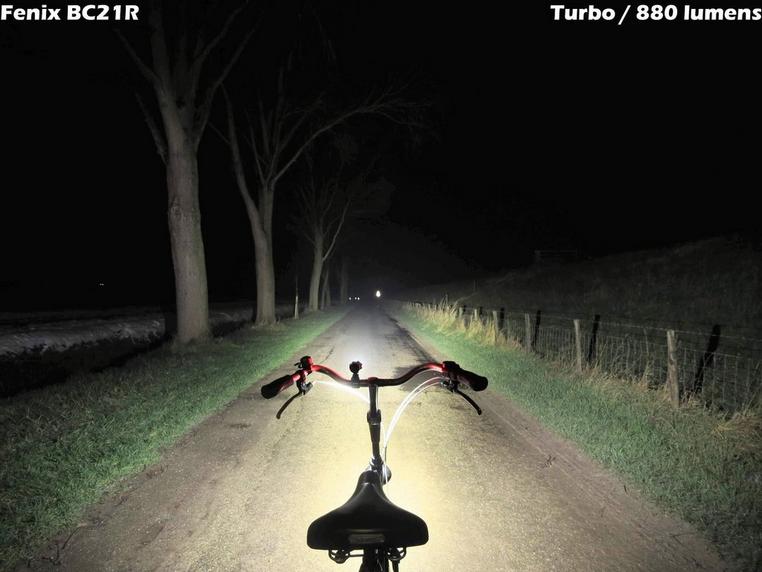
To compare, below the Fenix BC21R from the same position You can see a clear difference in terms of colour. In addition, the BC21R has a more even beam and a little more reach. But pay close attention to the tree trunks: The BC25R only lights up a part of the trunks, while the BC21R also partially lights up the branches. This demonstrates that the BC25R won't bother oncoming traffic as much.
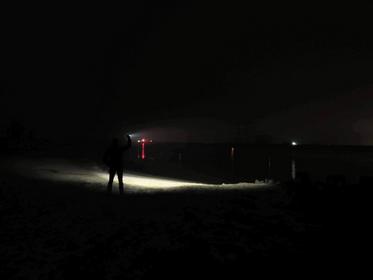
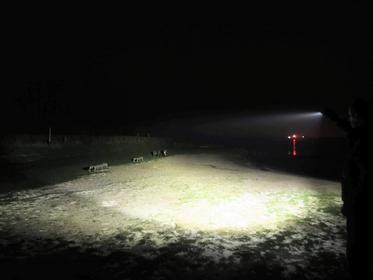
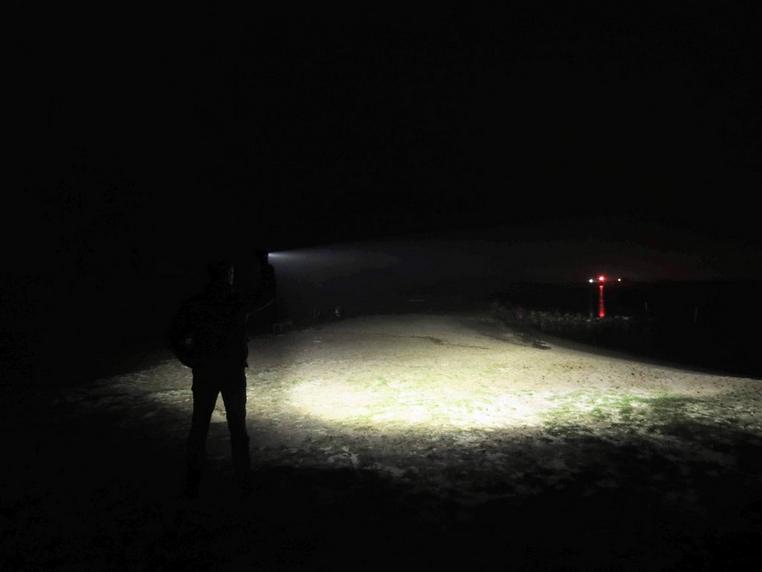
I would like to discuss the other option of the BC25R again: to use it as a flashlight. As you can see below, you will have a broad beam at a short distance at your disposal with this light. Perfect for common situations, but not as a search light. During our trip it had snowed a little; this really helped me to properly show you the colour of the light.
Conclusion
Despite the considerably lower price, the BC25R is a great choice when you are looking for a bicycle light. It is properly constructed and can easily be charged. In addition, the light is easy to use. In the middle modes it will last for hours, for longer trips you can always mount a power bank to your handlebars for emergencies: as it is charging you can still use the light. The main advantages are the light profile (which doesn't blind you and covers a wide area) and the fact that you can use the BC25R as a flashlight. (Dis)mounting is also a piece of cake. Personally, however, I would love to add a lower mode to the BC25R: especially in city traffic you will see enough with 10 to 25 lumens and, at the same time, with this amount of light you won't bother oncoming traffic. Other than that it is a great choice for everyday use: The BC25R will offer you enough light and you can even use it as a flashlight
Koen van der Jagt
Ever since he could walk Koen has been interested in lights, wires and batteries. As a child he was always working with dyno torches, bike lights and electrical boxes. The krypton and halogen lights were replaced by LED lights. A couple of years ago he discovered the ‘professional’ stuff. His first brands were Led Lenser and Fenix. Photography is also one of his hobbies. In addition to nature and meteorology Koen loves to show others what a light can do and what its beam looks like at night. Koen’s reviews can often be found on forums such as candlepowerforums.com and taschenlampen-forum.de. Throughout the years Koen has collected lights in practically any category: from small and compact to enormous powerhouses.

